How to Put Your Location on a Snap
When it comes to socializing, Snapchat is an engaging and entertaining app. It is very popular among teenagers since they can exchange immediate photos and play streaks with their pals. Adding a location and geo-filter enhances the fun by allowing you to share your location with a single snap.
So, if you want to know how to put your location on a Snap, the we have got you covered, follow this guide you will get to know more about it.
How to put your Location on a Snapchat Post in the iPhone App?
Follow these steps to know how to put your location on a Snapchat in the iPhone app.
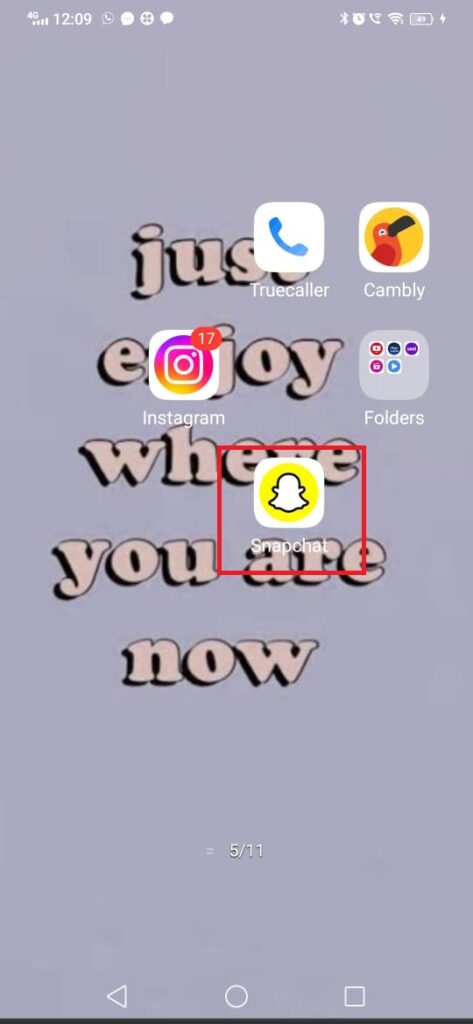
Step 1: Open Snapchat app on your iPhone device.
Step 2: Now you have to choose the photo or either you can take from camera roll for adding the location in your Snap.

Step 3: Next, you need to Swipe right to see the Geo-filters.
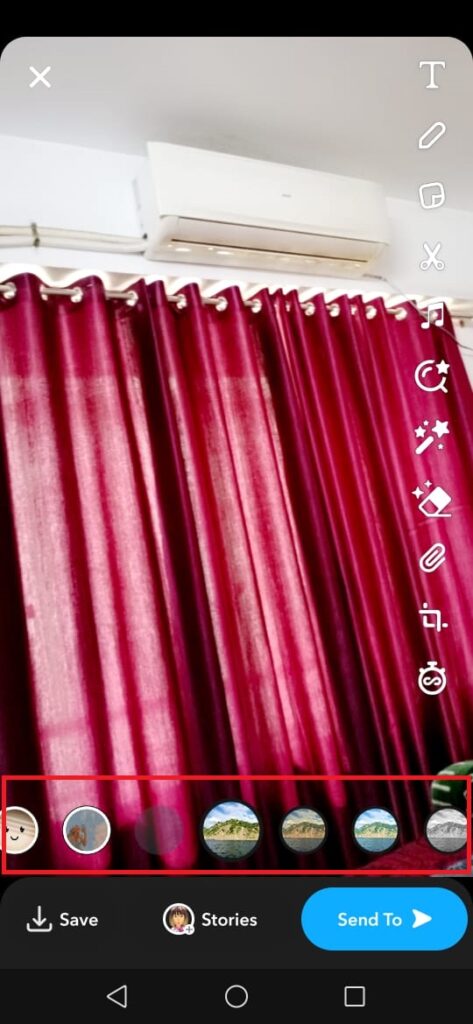
Step 4: Swipe left so that you can find the geo-filter that you are looking forward. You can see most of the filters are of city or landmark specific.
Step 5: Click on the location filter so that you can easily apply to your Snap photos or videos.

Step 6: You can also drag the location filter or else you can also modify the size by zooming it with the two fingers

Step 7: Thats it!! now you can share your Snap with your Snapchat friends or else you can also post it on Snapchat
Note to remember: You need to make sure that before applying location filters on your Snapchat stories your iPhone location must be turned on.
Bonus Read: How to make a second Snapchat Account
How to put your Location on a Snapchat Post in the Android App?
If you are using Snapchat on Android and want to know how to put your location on a Snapchat post, then just follow these steps:
Step 1: First you need to open Snapchat app on your Android device.

Step 2: Select a photo or video or else you can also take it from your camera roll on which you want utilize location filter.

Step 3: Next, click on the Paperclip option at the bottom right side so that you can add the sticker.
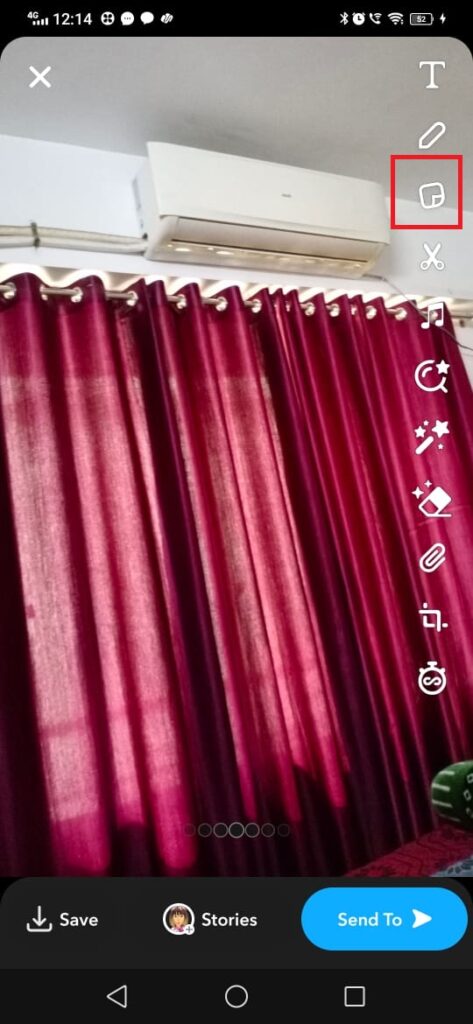
Step 4: Now, click on the Location sticker, as you can see in the picture.

Step 5: After this to access your location, you need to grant Snapchat permission.
Step 6: Here, you can select the place or the location that you are looking forward to add in your location sticker.
Step 7: You can also drag the location filter or else you can also modify the size by zooming it with the two fingers.

Step 8: Lastly, click on the send button so that your picture will get published on which you have added the location.
Bonus Read: How to Turn OFF Ring Flash On Snapchat
How to enable/disable and share Location Filters on Snapchat posts?
Consider these steps to know how to enable/disable and share location filters on Snapchat posts.
Step 1: Open the Snapchat app on your device, then under the menu which on the left side select the Camera option.
Step 2: Click on the Gear icon, under this tap on the Settings menu.
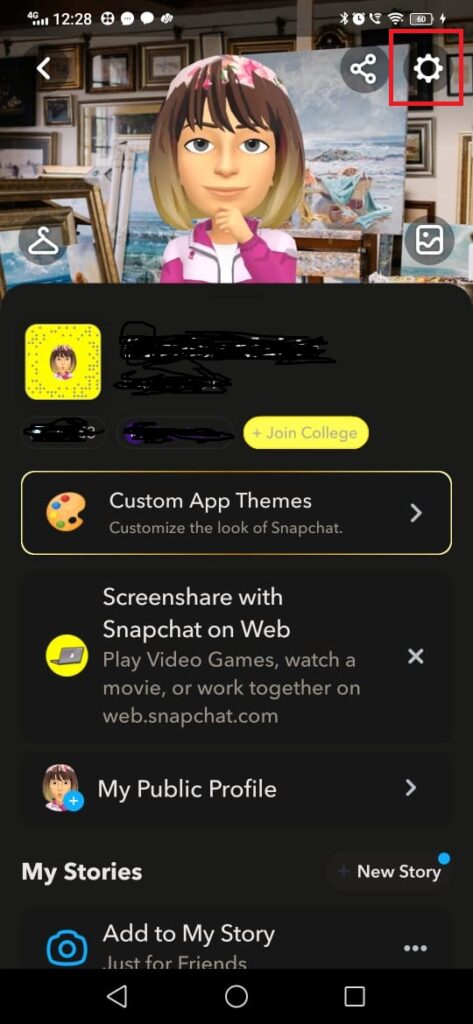
Step 3: Now, you have to simply scroll down until you can “Who can”…
Step 4: After this click on the “See My Location” button so that you can easily see your position on the Snap Map.
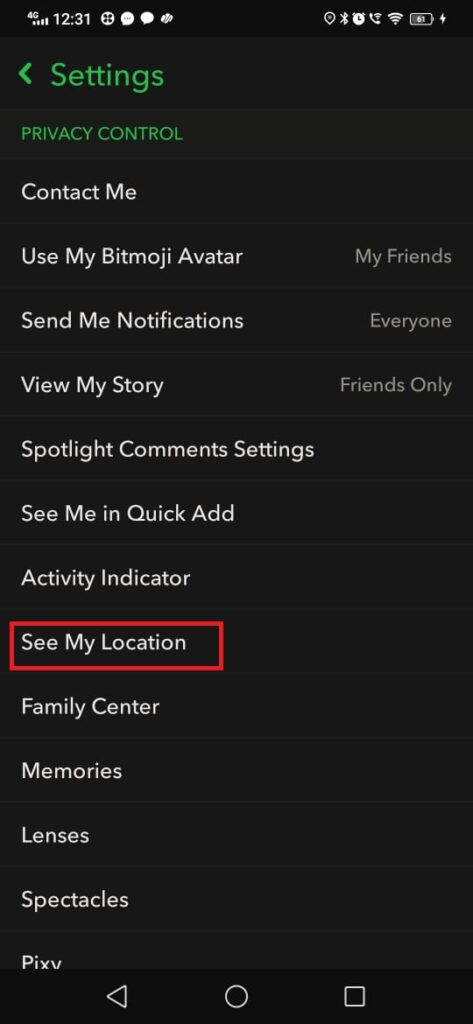
Step 5: If you don’t want to see the location filters on your Snaps then you can simply turn it off under the Mange section, as you can see in the screenshot.
Apart from this if you are looking forward to know how to share location on Snapchat with your friends and followers then you can simply follow the below-shared steps.
Step 1: Open camera of your Snapchat so that you can take a picture.

Step 2: To see the different filter options, you need to Swipe the screen to the left or the right side.

Step 3: Now you can see the location filter which can shows your city name.
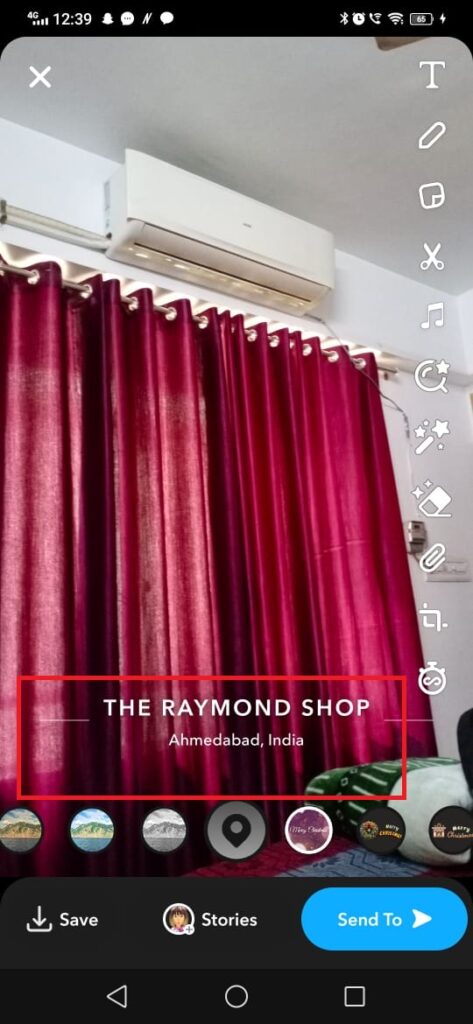
Step 4: Next, click on the Location filter to add your location.
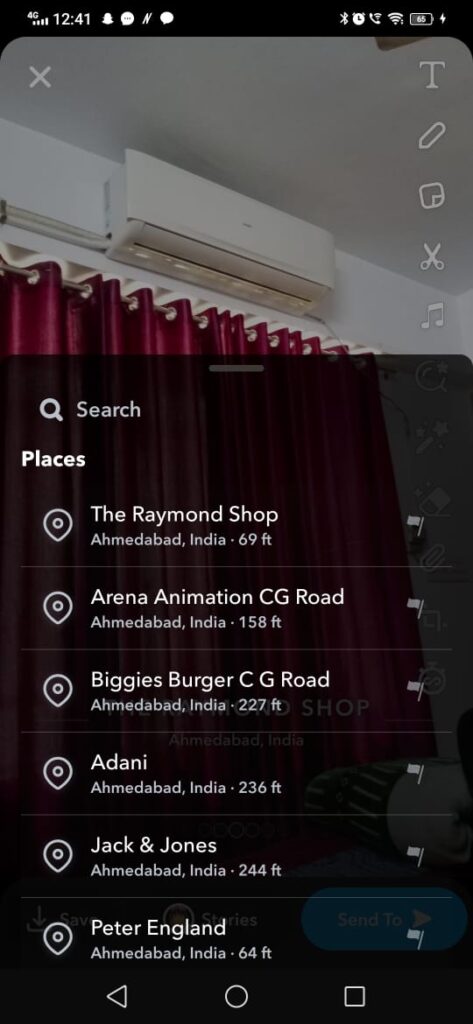
How to Add Location on Snapchat via Sticker
Are you finding a way to know how to add location on Snapchat via sticker, then you need to follow the below-mentioned steps:
Step 1: First, you have to select the picture that you want to share on your Snapchat stories or Snaps.

Step 2: Under the Editing menu click on the stickers option and there you can find the Location sticker as shown in the picture.

Step 3: Now you can simply add your location by using the location filter.

Step 4: You can also modify your location sticker as where you want to keep it, and then you are done.
How to Add a Location Filter on Snapchat Post
Consider these steps to know how to add a location filter on Snapchat post.
Step 1: Launch Snapchat app on your device.

Step 2: To open the Settings option, you need to click on the Bitmoji at the top left side.

Step 3: Under the settings option you have to scroll down and tap on the Privacy control tab, and inside this you can see the “See my location” option.

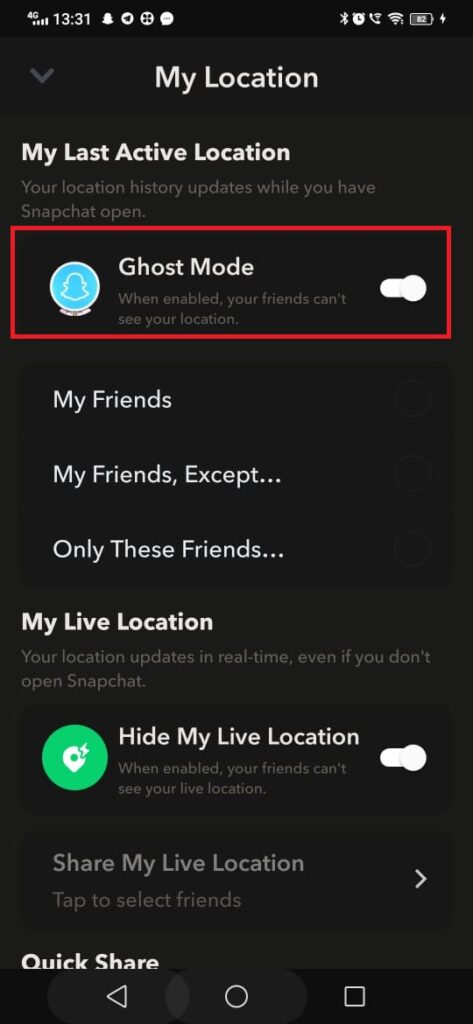
Step 4: Now, you have to click on it and simply turn it off, if you have turn on the Ghost mode on.
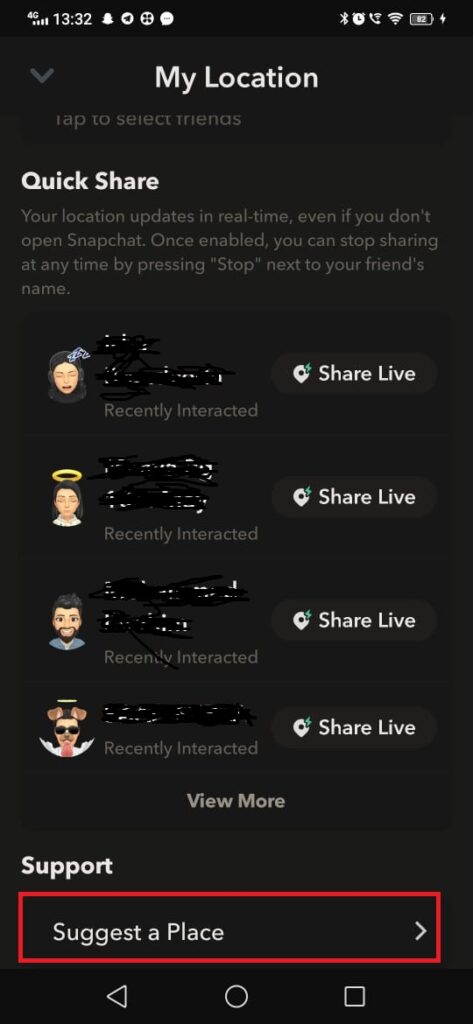
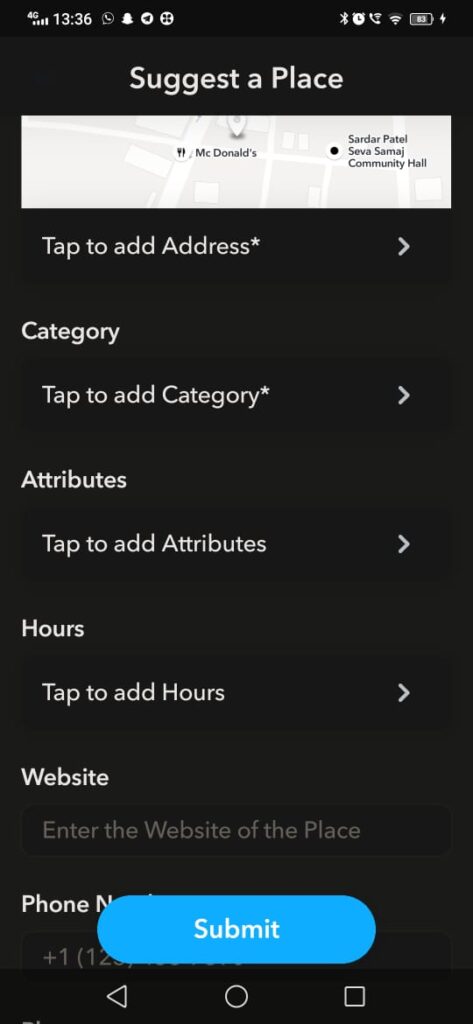
Step 5: Next, you can click on the Suggest a Place option and you can suggest the location.
Step 6: After this you have to select the media and just swipe across the filters there you will get to see the location filter.
How to add location on snapchat filter
Consider these steps to know how to add a location on Snapchat filter.
Step 1: Launch Snapchat app on your device.
Step 2: To open the Settings option, you need to click on the Bitmoji at the top left side.
Step 3: Under the settings option you have to scroll down and tap on the Privacy control tab, and inside this you can see the “See my location” option.
Step 4: Now, you have to click on it and simply turn it off, if you have turn on the Ghost mode on.
Step 5: Next, you can click on the Suggest a Place option and you can suggest the location.
Step 6: After this you have to select the media and just swipe across the filters there you will get to see the location filter.
Frequently Asked Questions (FAQ’s)
Why can’t I add location on Snapchat?
The Add Nearby tool is available on your Add Friends screen and is only available if you enable Snapchat access to your specific location. The Add Nearby feature is disabled by default, and you must enable it to find Snapchatters nearby and to appear nearby to other Snapchatters.
How do you track location on Snapchat?
To track location on Snapchat, Snapchat takes the real-time location tracking data. If you are closing the Snapchat then your Snaps map will stops updating but you will be to see your last location which can remains visible for 24 hours. If you want to disable this then simply you can turn off the location access for Snapchat under the phone’s settings.
How do you send a snap to a location?
Follow these steps to know how to send a Snap to a location.
Step 1: Open the Snapchat app on your device.
Step 2: Next, you need to create a Snap.
Step 3: Now, you have to click on the “Snap Map” that is shown at the top of the “Send To Screen”.
Step 4: Lastly, click on the button to submit.
Can I fix my location on Snapchat?
By following these steps, you can easily fix the location on Snapchat.
Step 1: You have to change the Snapchat privacy settings on your phone.
Step 2: Next, open your phone’s Settings.
Step 3: Under the Location Settings, you need to turn on the Location button or else you can also enable the Location services in the Privacy and Location Services.
Did Snapchat get rid of location?
If your Ghost mode is on, then your location will get disappear from the Snap Map after 24 hours.

